

Hero Forge: How to Create a Mini
In this tutorial we will discuss what each of the sections of Hero Forge are, and how to use them to create your first mini. This is purely community content, and not sponsored or endorsed by Hero Forge at all.

Getting Started
On the first page of Hero Forge, you will see a standard hero, and from here you usually will begin to create your character. The community over on Reddit has shown off the true potential of this service by making some truly incredible things. In our experience, we found this service by attempting to create a mini for our Dungeons & Dragons character, but as you can see on that subreddit - you can use this service for a great many things.
So to get things started, you can pick your race on the right hand side. This will load a pre-set character of that race for you, which will really speed up the process for you.
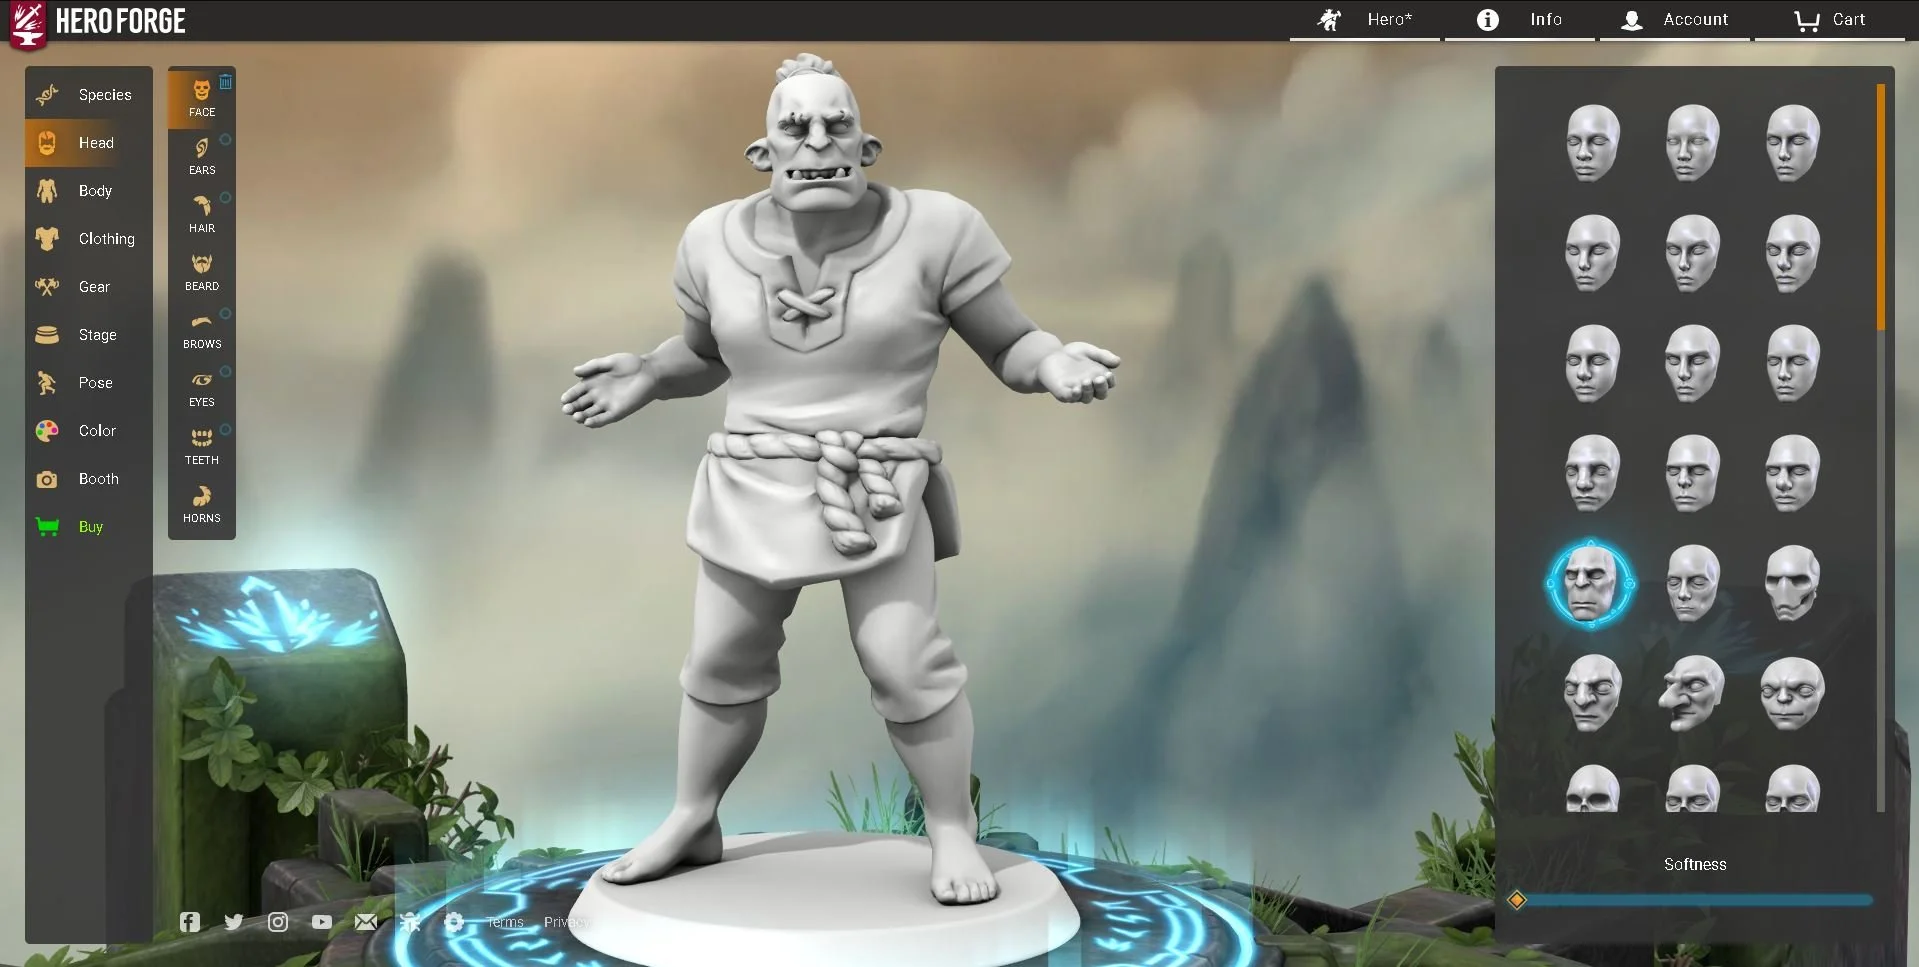
Head Details
Once you select your race, the next option is to tweak the details of your head.
Starting with the face, you can pick a large variety. Choosing your race in the previous tab will pick the closest, but you can change it to anything else you may want. An orc with a goblin head, or perhaps just a skull. That can be done.
You tweak the rest of the head details here too. Ears, hair, bead, eyebrows, eyes, teeth and horns. Horns include features like halos, too.
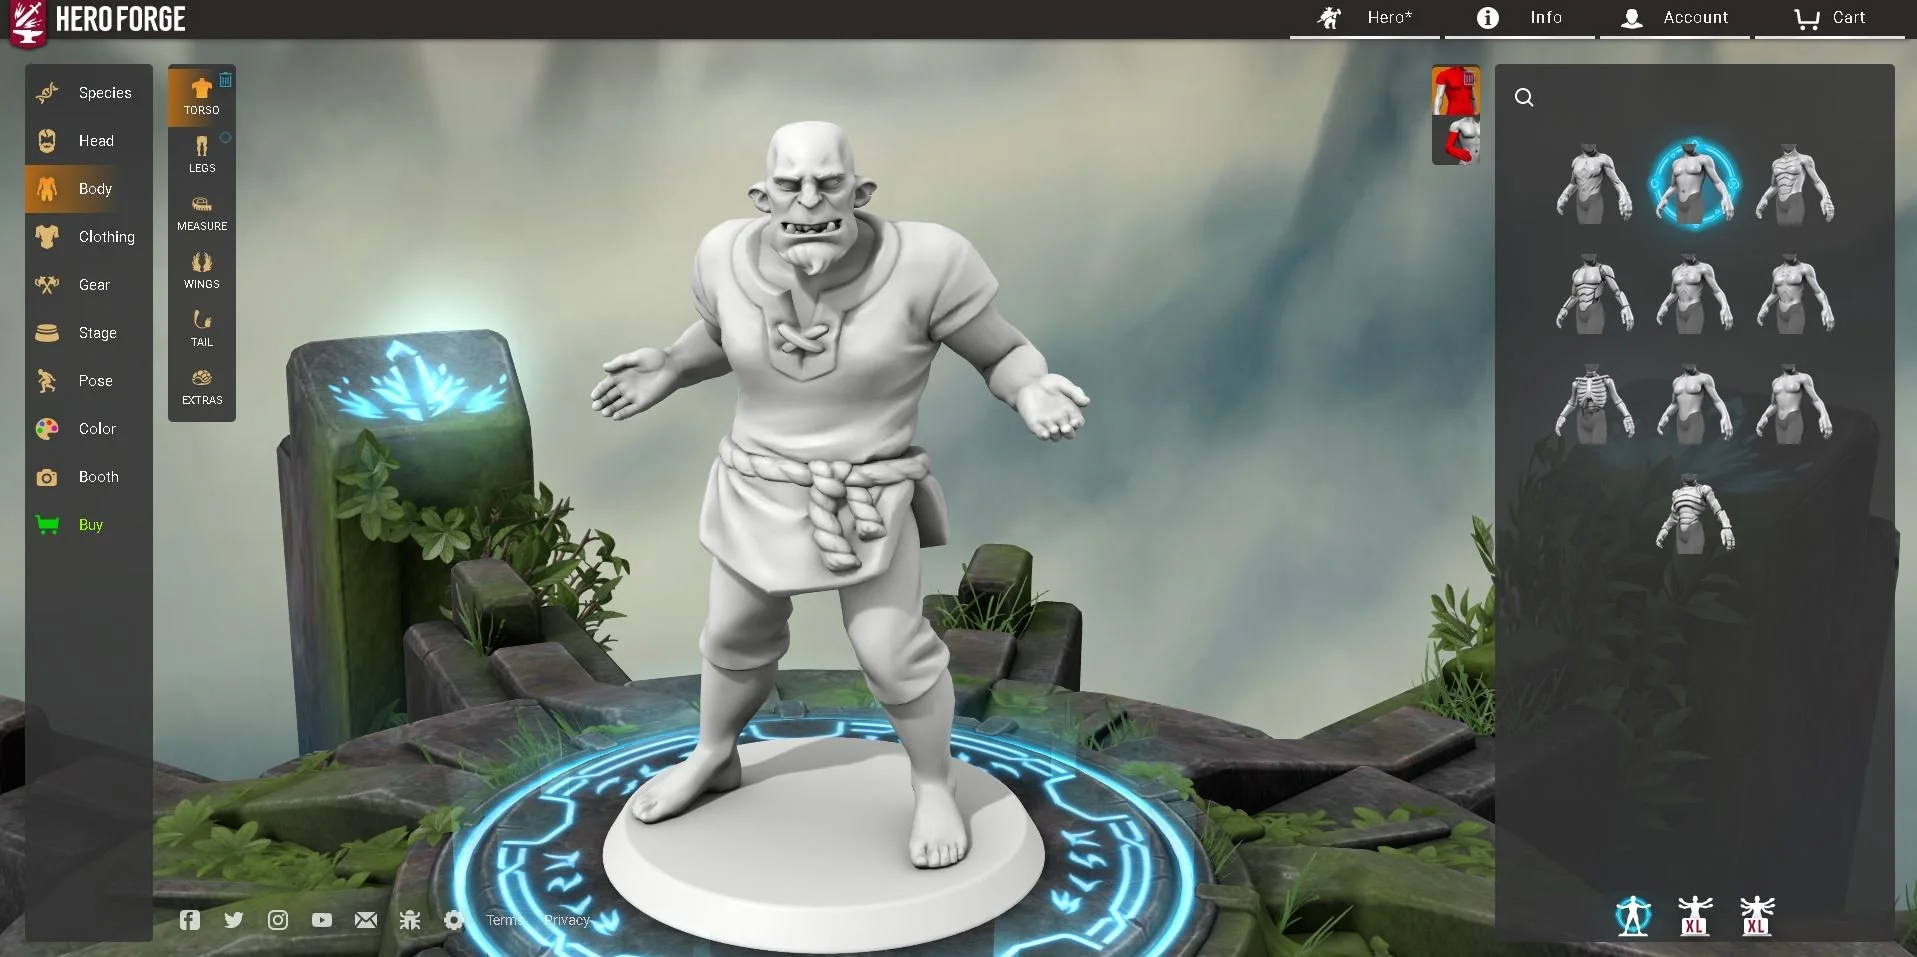
Body Details
This is where you update the overall body. From here you can change the torso type, and update the arms. On the left of the torso pane, you can see two red icons, those toggle between the torso and arms. That same system applies to legs.
The measurement tool allows you to change the height, weight and dimensions of your mini. You can also add wings, a tail, or even some extra features like spines along your back, arms or legs.
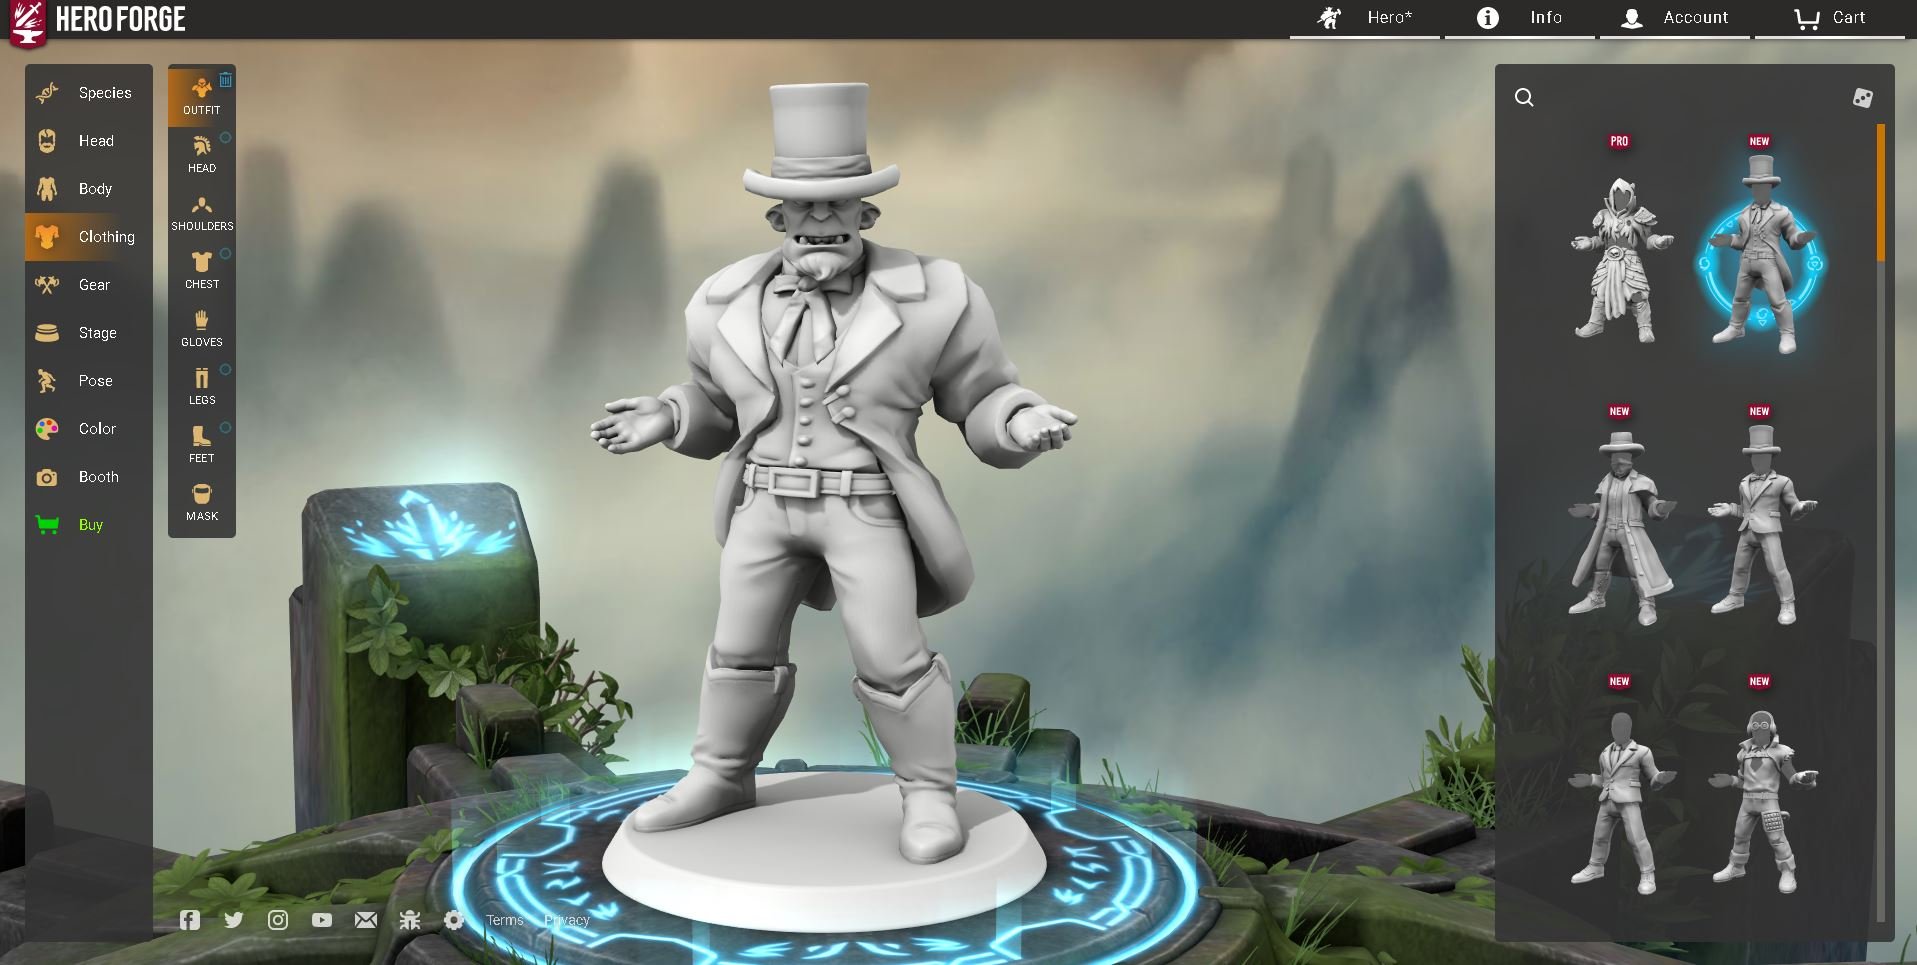
Clothing
In the clothing section, you can select pre-sets or simply select each piece by itself. You can also select a pre-set clothing choice that’s close to what you want, and then tweak it in each of the alternate clothing tabs.
You can zoom in and out with the middle mouse wheel. You can move up and down by holding the right mouse. You can then twist the model by using your left mouse.

Gear
This is where you add the small details to really finish off the mini-figure.
You can put weapons in their hands or on their sides, or back. You can add a backpack or a cape, or a multitude of little niche items.
Finally you can add goggles, masks, and pierings. These will really help to personalise your character.
If you have items in mind you can use the search bar and it will bring up the closest matching item to your request.

Base
The base is the next thing on the list. This allows you to change what your character is standing on. This can be a mount, a standard base or even a larger specialised base. Usually it comes with a default pose, but you can change this later.
You can also add smaller features, like familiars, various items and even a d20. This tiny flourishes really bring the whole thing together.

Pose
This is where you tweak the final parts to get your mini looking fresh. If you perhaps put on a cape, long hair, a long coat and a sword on the back, you might notice a lot of clipping, for example. You can change all of that here in the pose options.
How it works is you click on the corresponding option on the top right, and then adjust the sliders to move the objects to the desired location.

Paint
Here is where you can colour your mini. This is useful if you plan to use it as a token, a picture, or even if you plan to have it printed in full colour, which is an option.
You can also use and move the lighting, which allows you to give a more natural look to your Minifigure.
The colours have multiple options, but mixing colour (at the time of publishing this) is a feature that is only for Pro users. We will break down the bonuses for using Pro below.

Booth
This is where you can take pictures of your miniature. You can either use a background or make it transparent. You can also take a token image for use with things like virtual tabletop games.
The scene is a great way to take a picture of your entire party in one picture. You can add multiple Minifigures into one picture using a scene.
When you’re happy, click the little arrow next to “capture” to change the quality.

Buy
Here is where you can purchase the Minifigure you want. If you have a 3d printer at home, you can just get the STL directly and print your mini as many times in as many sizes as you would like.
If you prefer, there are many options to purchase a specific mini type from Hero Forge directly and they will then send it out to you. You can even get the mini pre-coloured to your specs.
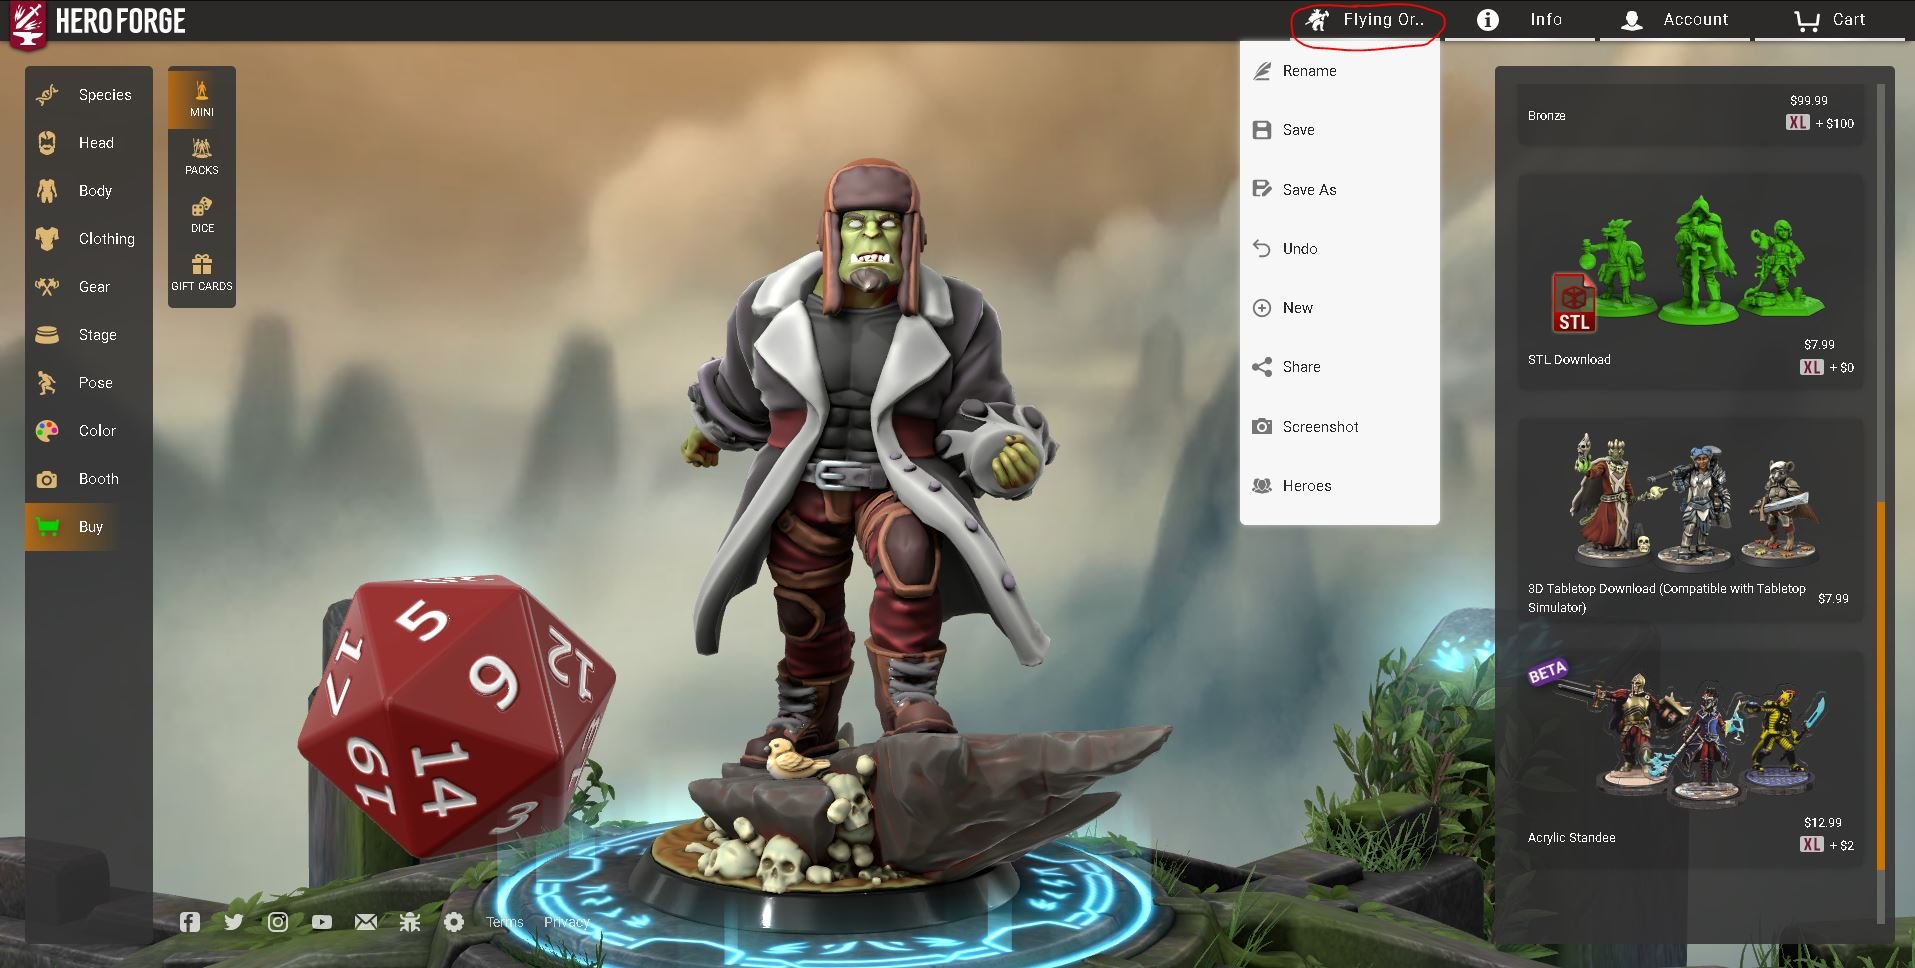
Save & Rename
You can click on the name on the top of the screen to allow you to access a menu. From here you can do the following:
Rename, Save, Save As, Undo, New, Share, Screenshot and Heroes.
Share allows you to send the files to other people to see and edit the miniature themselves.
Heroes is a folder where your saves are all stored.
Pro Features

Pro Features
If you get the pro subscriptions you get quite a lot of content. You can view it all in the image. If you wish to learn more in detail you can always check their website information here.
The pro features add a variety of things, but if you have a 3d printer then one of the most useful add-ons is the free digital credits. You get 5 per month to use on any mini you want, which allows you to get 5 free STL’s per month. If you sign up for the annual package you will get all of the credits at the same time.
That is basically everything you need to know about your first Hero Forge creation. There will be a few more articles to help you hone your skills with Hero Forge, but if there is anything specific you want to request then please feel free to use our social page and reach out to us.